
Return to Equipment, Hints, Tips
Review of Yongnuo GPS Receiver N918 N1 for Nikon (Nikon GP-1 copy)
Rating: 5/5
Bought mid 2012, Ebay, approx. £42 (from “yespainting” in Hong Kong who I have used several times and have been delighted with).
I have not had this unit long at the time of writing but it appears to work well. It is very small & light weight, appears to be well made, and it cost about 20% of the price of the original Nikon GP-1 GPS receiver.
|
|
The unit appears to be fully compatible with both my D300 cameras (I have not tried it on the D200 yet (it is also stated to be compatible with the D700, D3, D3s, etc. with a 10-pin remote terminal) and Nikon software, and pinpoints the camera's shooting location of each frame taken anywhere in the world to within a few metres. I have had a number of frames register a little way from the actual location that the specs suggest it should, at most by a few hundred metres, but this is not an issue for me and is probably not unique to this unit. Typically it is accurate to within <10m which is perfect for me and equivalent to the Nikon unit. I want the unit primarily for overseas trips so that I know roughly where I have been and where each image was taken within huge National Parks etc. Indeed, I will probably buy a second unit for my next big trip so I can keep one on each primary camera. It’s a bit of fun and curiosity, nothing more serious than that. Any minor inaccuracies can easily be corrected if required provided that you know where you actually were (based on a landmark etc.) or have if you have other images with the correct location data. |
.jpg)
Data can be copied from a tagged image to ones that are not e.g., after shooting from the same location with two cameras but with only one having the GPS unit attached, or the location pin moved and resaved to do manual corrections. This can all be readily done using Nikon's free View NX2 software.
|
|
Clicking on the "Geo Tag" icon The pin relating to the specific image which was selected is highlighted, although I find the highlighting to be minimal and not always easy to identify if there are lots of other pins in the same region. If the images were taken over a large area e.g. several miles apart, they may not all be visible in the initial view, however the field of view can readily be increased or decrease by use of the zoom feature. It is also possible to switch between "map", "satellite", “hybrid” or “physical” views etc.. Highlighted Pin |
 whilst a GPS tagged image is selected in Nikon View NX2 software brings up a map of the area where the image was taken. Location pins are displayed for each image with a GPS tag in the same folder (it can take a while and look quite congested if there are a lot of images in the folder).
Anyone vaguely familiar with Google Maps should feel immediately at home, indeed the viewer within View NX2 is 'powered' by Google Maps.
|
Standard MAP View |
PHYSICAL View |
|
|
Standard SATELLITE View |
HYBRID View
|
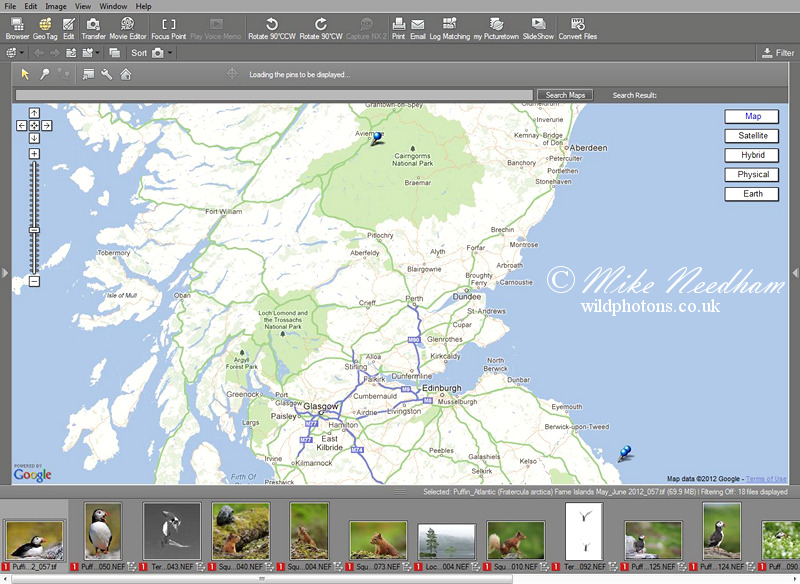
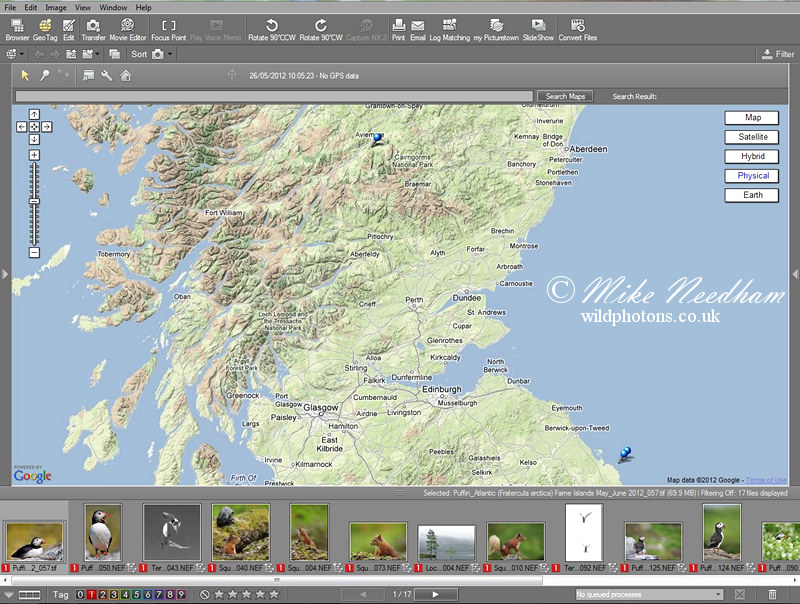
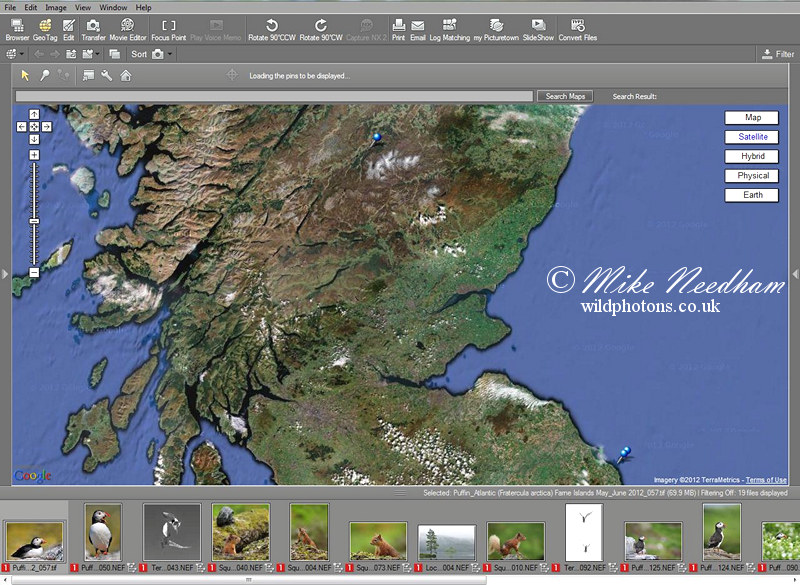
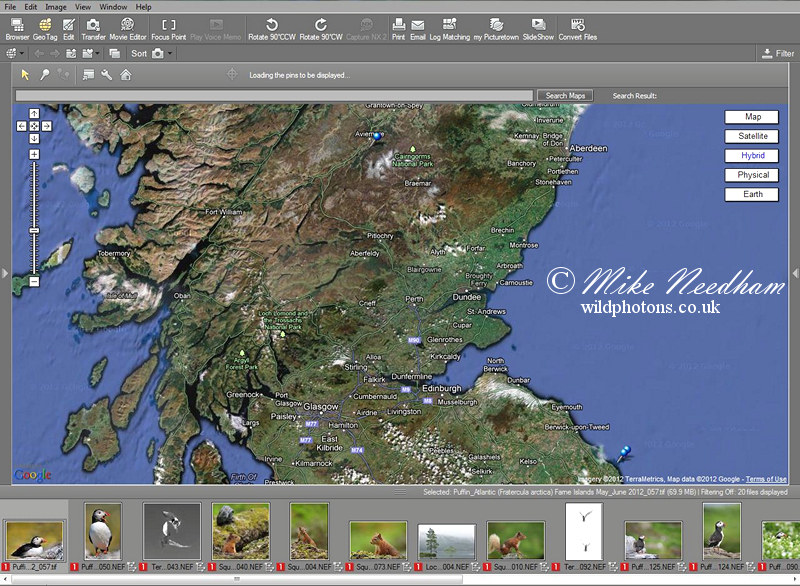
The 4 viewer options in Nikon View NX2 powered by Google Maps showing images in the same folder shot in both the Cairngorm NP and on the Farne Islands.
|
Moving individual pins is simply a matter of selecting the pin icon
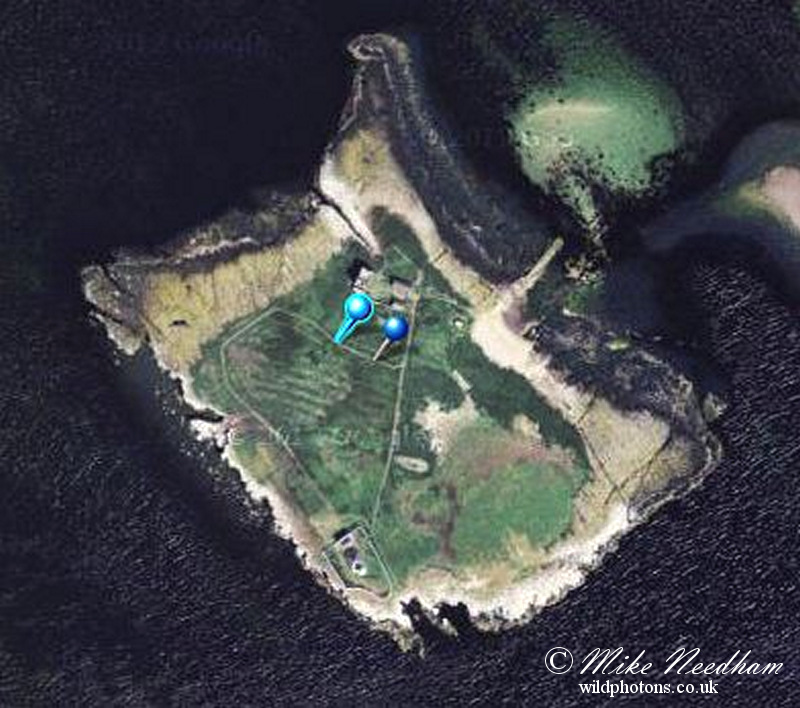
Here the pin has been moved to the ocean to emphasise the change |
 |
 from the toolbar and then clicking and dragging the required image pin on the Geo Tag viewer, the GPS data attached to the image is then updated and saved once the move is confirmed. Clearly this means that there is a need for a little care if you want to keep your data as you recorded it, but the system does ask you to confirm any manual move of a pin. Initially I pondered over the point of this feature, and similarly the ability to copy and paste GPS data, however I quickly found both features very useful.
|
Toolbar within the Geo Tag viewer screen.
|

|
I used the manual pin relocation feature when in a series of shots taken from say a fixed hide and I had one or two images with GPS tags several hundred metres away from the main cluster. Clearly there was an error in the data for these, possibly because the camera had been dormant for a little while and the GPS unit had deactivated to save power and thus lost its location lock which had not been regained accurately enough once shooting restarted. Or perhaps the unit simply delivers more significant errors occasionally. There are also very occasionally images with no tag, again likely as a result of the unit not being given enough time to find its location. Either way I am not going to worry about a few 10's of metres, or the odd untagged image, but it is nice to have the option to correct blatant but occasional positioning errors.
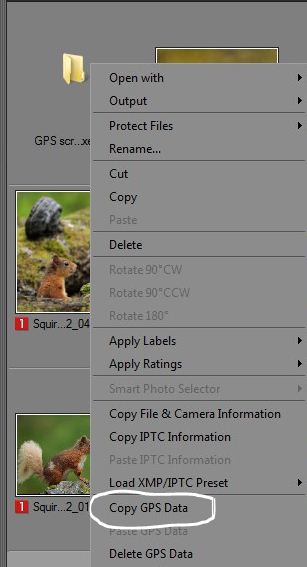
The copy / paste function in particular I do now find incredibly useful. For example, shortly after buying the unit I trialled it on the Farne Islands (just off of the NE coast of England) on one of the two cameras I was shooting with. The images taken with the other camera obviously had no geo tagging so in order to identify which Island they were taken on, so I simply copied the GPS data (right click on image, “Copy GPS Data”) a tagged file, selected all of the images from the same island but without data, and pasted the copied GPS information to them (“Paste GPS Data”). Simple and all the images from the island had GPS data in one easy operation. Perhaps not from the exact spot but that is not so important to me, but I could have matched things up better given a little more time and effort. There is also the option to delete GPS data in a similar way, perhaps if sending images to a third party where you do not want the location identified.
Right click on image, “Copy GPS Data”
|
 |
|
|
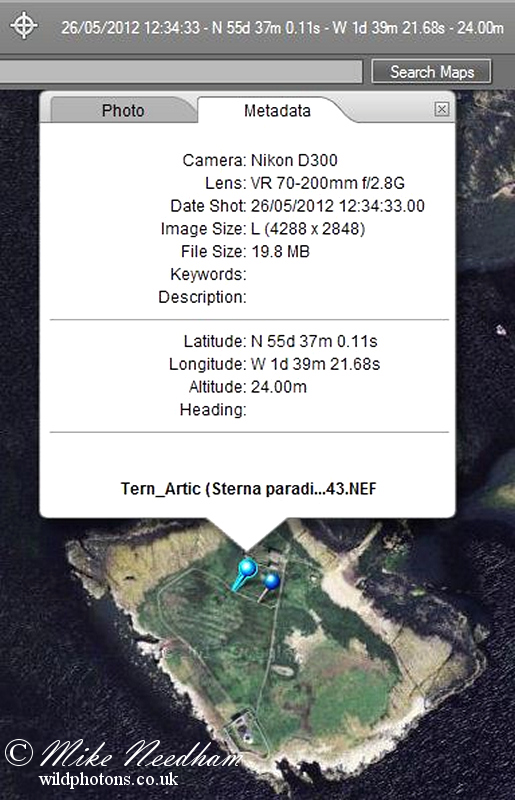
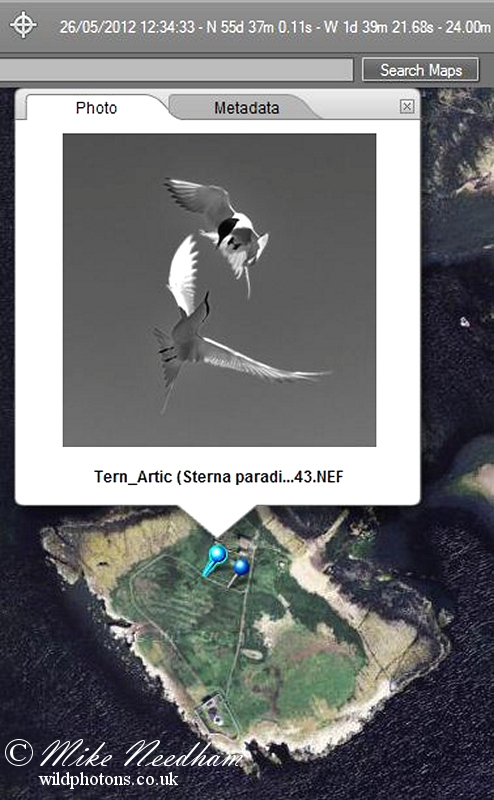
Another nice feature is the ability to click (single left click) on a location pin and the image specific to that pin is shown along with the GPS data and the file name (left image). This window also has a second “Metadata” tab which can be clicked to display a limited set on EXIF data (camera, lens, date & time, file size, etc.) and another, easier to read, copy of the GPS information (right image).
As discussed above, the unit plugs into the camera via the 10 pin remote terminal and therefore prevents the use of a standard electronic release cable such as the MC-30. Nikon's own unit obviously also has the same limitation but, unlike the Nikon GP-1, the Yongnuo comes with an addition electronic release as standard which has a short coiled lead that plugs into the side of the GPS unit. The combo can therefore be used as an electronic cable release too. A simple but brilliant solution and all included in the cost.
|
 |
|
Yongnuo GPS Receiver N918 with 10-pin connector (N1 version) for Nikon and included remote control attached |
Before buying the unit I had read several reports on the web that Nikon's own unit saps quite a lot of battery power from the camera (the units are powered by the camera). I have not done any controlled testing on this unit but anecdotally I would agree with this. The camera does however allow the user to set up the unit to either stay only all the time the camera is on, or to shut off and power back up in sync with the viewfinder display / exposure meter. I have set mine to the latter, it risks not getting a firm position if you start shooting immediately before the GPS locks on to the satellite signals (and may explain my few 'strays' discussed above) but it does reduce battery drain considerably when shooting intermittently. Clearly this would work just the same on the Nikon GP-1. If I needed the tagging for something really important then I would probably have bought the Nikon unit, but for a bit of fun it is way over priced IMHO. After using this unit I would now not consider the Nikon offering regardless of what I was using the data for. This unit fits the bill nicely and I am looking forward to taking it on future overseas travels. For me the £42 I paid is getting towards to top side of what I would pay, I have seen the same unit for approaching double this which I think is much too much. And £200 for the Nikon GP-1? Only you can make that decision but I am delighted with yet another fabulous and cost effective Yongnuo product (I also have the 8-AA version of their SD-8a flash battery pack copy, also from “yespainting” and was the reason I settled on the Yongnuo version from amongst several third-party offerings) leaving me to spend my hard earned where it really matters; Nikon camera bodies, Nikkor glass and travel to destinations where I can actually shoot some pictures. |
.jpg)
Foot note - I used the GPS unit when photographing bears in Slovakia, it worked just like it did in the UK. Result!
Closing thoughts: there are other versions available from Yongnuo to fit other Nikon cameras without the 10-pin terminal used only on high specification models. Thus if you have multiple cameras with different connectors you would need separate units. Here the Nikon unit scores a few positives over this offering as I believe it has different interchangeable cable options supplied as standard so that the same unit can be used with different spec cameras. You would however need to make use of all of the different options to close the cost differential of buying separate units, and you still only have one unit which should it fail leaves you with no GPS. These units are very small and light so carrying multiples would not be an issue so I would probably still go the Yongnuo route even if I have two or more different camera types.
Return to Equipment, Hints, Tips